I Actually Liked the Dress a Little More

Hello!👋
Hope you have been keeping well!
I have been enjoying spending the holidays with my kids and the slow pace of creating!
I have had quite a bit of time too to think about so many projects I would like to make!
I have 2 bags full of clothes I would like to upcycle, most don’t fit my post baby body and I love the fabric of the garment too much to just let them go. 😅
There are also a few different knitting projects I would like to make, and one of them you know about already, socks. 😀
The second Jasmine Sweater by RitaMadeThis that I started last week is well underway! 🤗

I have managed to knit up most of the front bodice and it is looking gorgeous! 😍
I am using one strand of Drops Air together with one strand of Drops Flora and I added the silver thread too.
I have been stopping now and again to just admire the pizzazz the silver is adding to the bubbles! 💎 😍
And on the note of pizzazz, I bought some silver beads this week! 🤭

Another project I would like to tackle is adding these silver beads to the next sweater I knit, just to spruce it up a bit, and like always, I am sooo excited to get to this soon! 😀
The birthday dress for my daughter’s best friend is nearly finished! Just needs hemming.

For the last few months, every project I start feels like it is going to take ages, and then I am surprised by how quick some of them get finished because of this. 🤔
This Piper dress by Violette Field Threads was one of those projects!
It’s a simple A-line dress with a lining and you can choose to keep it simple or add the shoulder ruffles and back bow like I did.

I feel like now is my chance to put ruffles and bows on as many of the kids' clothes as possible, as once they grow into teenagers they may not want all of it, and this includes when I make things for my daughters' friends too.
As soon as my daughter saw this unicorn fabric, she wanted me to make the dress for her friend in it and requested one for herself too. 😵
I explained to her that she had more than enough dresses to see her through the next few months, which she took quite well, but I added that I could make her a bag instead - a matching bag with her friend! 😂
The things I get myself into. 😂 🤦🏼♀️
I had my eye on a few bag patterns but I knew I needed to keep it simple because of time, especially since I needed to make 2 matching bags, and guess who else wanted to join the bag party…my youngest! 🙈
Both of them had a good time in my sewing room picking out fabrics and opening a few of them, walking all over them and moving on to the next one. 😑

This is my eldest selection of fabrics for the matching bags. 😂
I allowed her to choose 4 different fabrics as the pattern I ended up wanting to make had 4 different prints as well.
Of course, the youngest also needed to choose 4 fabrics…

She chose these 4 which I don’t think go very well together at all and I am a bit hesitant to go ahead with these. 😅
I have changed some fabrics around and I think these combinations go better together:
For option 1, I just changed out the colourway of the Paw Patrol fabric:

For option 2, I changed out the green for the salmon colour, and also removed the galaxy to add the pink Paw Patrol:

I am not sure which option I want to go with for my youngest. 🤔
Which option do you think the fabrics work well together?
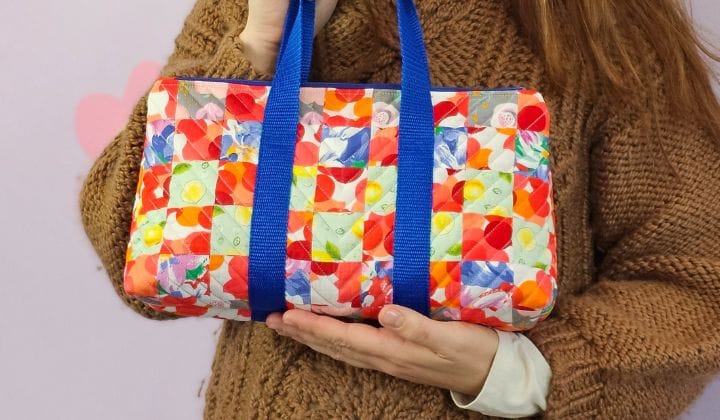
The bag pattern I chose to make is the Tiny Bag by SewCanShe which is a free tutorial by the way and here is an image I got from their website:

I showed it to my eldest and she said it was too small. Talk about demanding! 😂
But when you know what you want, it can be hard to convince you otherwise. 😅

I decided then to draft a new pattern based on the original pattern and she said again it was too small, she wants it to be wider. 🤯
So instead of making up a new pattern, I am just going to add 2 inches to one side when I cut the fabric out and it will make the bag a little wider.
I will also not consult her again in the meantime, otherwise she may want more changes! 😂
I was meant to cut the pattern pieces out at my sewing social on Saturday, but I didn’t have the time to, I don’t even think I sat down for the 5 and half hours! 😱
It was such a lovely day spent with such a lovely group of people! 🥰
There were such a variety of projects being worked on too.
Some of the projects worked on were dresses, a blouse, an apron and even a quilt. One person even started making her first pair of trousers from a fabric and pattern that was on the swap table!
There was a bit of an oopsie daisy moment with these trousers! 😂
It’s hard to concentrate on following written instructions in a room full of conversation. 😂

I got these photos sent to me which captured the moment I realised that something had gone heavily wrong! 🤣
All legs were sewn together making it a skirt instead of individual legs and that meant the crotch curve was sewn wrong too. 🤦🏼♀️
We only had about 10 minutes left in our session, so the quick fix was to just cut the seams off that were sewn wrong, forget about the instructions and just do them my way.
All that was left to do was hem the bottom and fold the top down to make an elasticated waist.
I wore my most recent make that I was a bit on the fence about, the Fleur Dress by Fabric Godmother.

After doing my hair and makeup and putting on some shoes, I actually liked the dress a little more.
Also, everyone at the sewing social were very lovely in making me feel really pretty in it, so thank you everyone! 🥰
I actually really enjoyed wearing it, it was super comfortable, the length felt perfect too! I think making it in a different fabric will make me totally love this pattern!
😎Confidence Corner:
“Sometimes you have to fight more than once to win it.” - Bradley Rose
To be successful, you often need to try more than just once to achieve it.
This quote reminds us that achieving our goals may need many attempts. Whether in work, personal life, or creative projects, we aren’t always successful first time round, and that's okay!
Every time we face an obstacle, we have the chance to learn, grow, and come back stronger.
Many successful people didn't reach their goals on the first try. They faced failures, adjusted, and kept pushing forward. It’s through persistence and determination that real progress is made. Every challenge you overcome brings you closer to success.
So, if you don’t win right away, don’t give up. Keep fighting for what you want. Sometimes, the real win is staying determined and never giving up. 🦾
🧵Today's Sewing Tip:
Encasing Seams Using the Burrito Method on a Sleeveless Garment
As part of the construction of the dress I made this week, it included doing the burrito roll to enclose the seam. It comes in handy when you are sewing yokes, linings, or facings, and gives your projects a professional touch.

First, sew the shoulder seams together of both the main and lining pieces.
Then lay them over each other, right side facing.
Match the shoulder seams, align the raw edges of the neckline and sew all around.
Grade the seam allowance and cut into the curves without cutting the stitch line.
You should have something like this:

- Turn the garment the right way out, give the neckline a good press and lay it flat in front of you.

- Open up one of the shoulders by separating the main and the lining fabric

- Lay them flat open with the right side facing up.

- Now take the other shoulder and roll it until it lays in the middle of the shoulder you opened up.

- Take one side of the fabric from the shoulder that is laid open and bring it over the roll to match with the raw edge of the other side that is laid flat like this:

- Pin or clip the raw edges together making sure that your roll of fabric stays in the middle and doesn’t come under your row of stitches you will now make.

- Stitch along the raw edge, grade your seams and clip into the curve without cutting through your stitches.


- Now reach into the shoulder and start pulling the fabric to bring it through the “tube” you just created. It may seem like you got it all wrong, but trust the process and keep pulling.
If it really is stuck, there is a chance you may have caught the other shoulder in your stitches and that is why you can’t pull it out. If this happens, just unpick it and try again. 🦾


- Once you have pulled all the fabric through, all your seams are enclosed meaning you can’t see any of the raw edges.

- Repeat the same process for the other shoulder and give it a press.
This is what your garment should look like from the outside and the inside:


⭐My Favourite Things This Week:
- Meeting everyone at my sewing social, Sew&Bond!
- Enjoying wearing my Fleur Dress!
- Seeing the Jasmine Sweater knit up beautifully with the silver thread!
- Making a cute dress for my daughter’s best friend!
🗓️Upcoming Plans
- Continue working on the Jasmine Sweater knit.
- Make a start on the 3 bags for the girls.
- Get back to my partner’s jacket - I am strongly thinking about ditching this now and just getting a pattern with better instructions, I have put this off for so long now because I do not want to deal with it. We, my partner and I, are quite tired at this point, him of asking and me of putting it off. 😂 So, if you have any recommendations for a men’s parka jacket, please let me know.
🎉Upcoming Events
21st of September 2024 - Sew&Bond - Sewing Social Event - in Gatley Hill House, South Manchester, 11:45h - 17:15h
Email bianca@beesilva.co.uk and quote reference: SEWBOND09
For more information: https://www.beesilva.co.uk/sewbond09/
26th of October 2024 - Sew&Bond - Sewing Social Event - in Gatley Hill House, South Manchester, 10:15h - 15:45h
Email bianca@beesilva.co.uk and quote reference: SEWBOND010
For more information: https://www.beesilva.co.uk/sewbond010/
Question of the Week:
Which fabric combination works best for my daughter's bag?
Sign in to leave your answer please!
Thank you so much for reading it! And if you enjoyed it, please tell a friend about it to allow me to reach more people. 🥰
Bye for now,
B! xx


Member discussion