My First Quilted Bag Workshop

Hello!👋
Hope you have been keeping well!
My kids were looking forward to Halloween this week to be able to go out all dressed up for trick-or-treating!
And I think this is the first Halloween I have not made anyone in my family an outfit for the day! 🥳
We recycled outfits this year, and I am very pleased that I didn’t have to spend time, that I didn’t really have this year, to make anything new.
My eldest went as a cat with a two-piece outfit I made her last year, a skirt and top.
My youngest went as a fairy, but wanted whiskers painted on her face because the eldest had some. 😂
They also demanded I dress up to go trick-or-treating with them.
So I wore my Freya dress from Tilly and The Buttons that I made about 4 years ago in, what I call, a leopard spot fabric.
I have only ever worn this dress 3 times now and I don’t reach for it more because of how the colour makes my face look. 😬
I put it on Thursday morning and when I looked in the mirror, I looked so pale even though I had already put some makeup on.
I decided to layer it with my black knitted Belle Vest from Rita Made This to break the yellow away from my face and I didn’t feel so muted anymore.
To complete the look, I used eyeliner to paint myself a cat face. I googled “adult cat face makeup” and just tried to copy one that I liked most. 😂

I think it turned out alright for my first time.
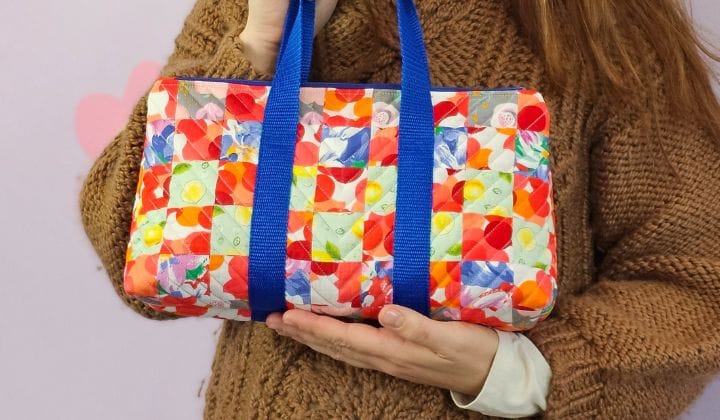
Finally, I finished the quilted bag I was working on to create a PDF document! 🤗

All the sewing instructions are ready, and I just need to make some tweaks to the presentation and format of the document.
There are a few other things that need to be done as well, things that I didn’t really think about until talking to someone about digitising the pattern, amongst other more technical things too.
Hopefully these little things will be sorted out quickly, because I am so ready to put out a tester call for this pattern! 😀
While this is going on, I needed a little breather from bag making and decided that I NEEDED to make myself something!
I went to bed one night thinking that I either needed to make another Lyra dress by Tilly and The Buttons in a blue leopard print viscose or a sleeveless Fleur dress by Fabric Godmother in a light blue chambray.


I woke up the next morning and do you think that I went with any of these options I basically dreamt about?
No! 😂
I decided that the Fleur dress was going to make the cut, and as I bent down to reach for the chambray fabric in my stash, another fabric caught my eye.

This khaki cord has been in my stash for about 4 years and every time I thought about it, dungarees came to mind.
I had made my eldest, even before baby sister was born, the Penny Pinafore from Waves and Wild in this fabric and it had been on my mind ever since.
Now that I think of it, I am glad that I didn’t make the dungarees in them. I feel a sleeveless Fleur will fit in my wardrobe much better especially as a layering piece now that we are entering winter.
I decided to go down one size from the white (hospital gown😂) one I made before, and that one was already one size smaller than my measurements. So I have downsized 2 for this one and I am not sure if it was a good idea.
I also moved the bust dart nearly 2 inches in as it was miles away from where I felt it needed to be to give me a better fit.
Ever since making these small changes, a small bust adjustment and moving darts, in my Fairwyn dress that I completed last week, I don’t think I can go back to ignoring that I need to play around with them to better fit my body.

I tried the Fleur bodice over a long sleeve top, because that is my intended use for it, and it felt a little tight, especially when I tried to put it on. 😬
There is no going back now, but if I really can’t get it on when it’s fully constructed, I think I may unpick the skirt and draft a placket all the way down to the hem and add ties all the way too.

The cord felt a little heavy to cut the binding for the neck and armholes and the pockets, so I cut out some cotton poplin for that in a matching background. I think it goes really well and also gives it a nice little pop of colour!

Let’s just hope I put the pockets in the right way round this time! 😂
I hope to get this finished this week because I want to move on to working on my next design.

I had already shown you this pouch but I had set it aside to be able to work on the quilted bag pattern I showed you above.
I already have all the pattern pieces cut out for a second sample and will be revisiting the instructions I had already started and taking new photos with this new one.

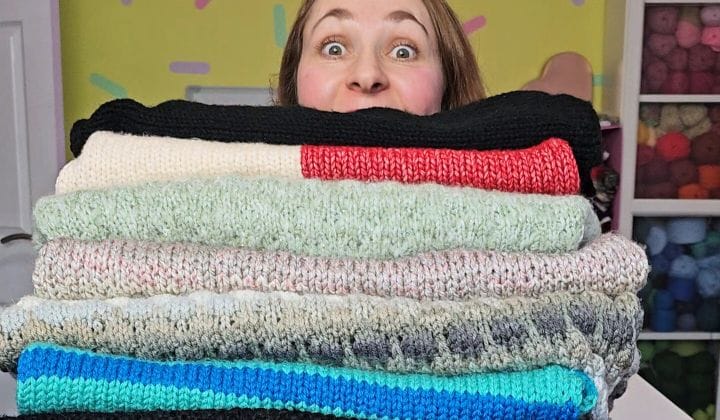
This week I completely forgot to finish Bi-Colour Snuggle Sweater in the red and cream Pebble Haze Aran Yarn! 🥴
I want to video my cast off like I always do, so I brought the sweater to my sewing room to be in full view so I wouldn’t forget.

But somehow it still slipped my mind.
I must definitely get to it next week because I can’t wait to wear it!
Really all I need to do is cast off both sleeves and sew around the neck to create a folded neckband. 🤞 I don’t forget next week.

In the evenings while I sit on the sofa with my kids, I have been picking up the new cast on… a pair of socks, well just one sock to start with.

I did think about knitting 2 socks at the same time, but I felt like it might complicate it a little for my first go, so opted to just cast on one sock for now.
I feel though that the sock is going to turn out too big, but I also don’t want to frog it all in case I am wrong, because once again, it’s my first time knitting socks. 😣
I have put my foot through it and pulled it on up to where I think I will be wearing it and it's not tight at all. Not sure really how it is supposed to feel because I have never tried on hand knitted socks before. 🤔
It will be really heartbreaking if I finish knitting one sock and it’s too large, I don't think I will have the will power to knit up the second one. Or unravel the first and start again.
Let’s see how it goes. 🤷🏼♀️
Still at the top of my list to make right now is another Evie Cardigan from Knit Stitch Repeat. In case you don’t remember which one it is, here is the test version I made a few months ago.

I haven’t been able to settle on a colour or colour scheme for it, but I definitely want to use something from my stash, hence the delay in starting this one.
Also, I couldn’t help myself, RitaMadeThis put out a tester call for another of her designs, a vest, and of course I applied!
You may or may not know that she is one of my favourite knitwear designers. Her designs just speak to me as if they were meant specifically for me.
It should be a pretty quick knit, as it’s an open front vest, tied at the neck with an i-cord and you can knit optional daisies on it. Of course I will be going for this option! 😍
I am currently stuck on what colour to go for and again, I want to use something from my stash.
Pink keeps coming to mind, but it is not a colour that will go well with most of my long sleeved tops. I need to think a little more and do some digging in my stash.

Today, Sunday, I hosted a pop-up Quilted Bag workshop and I really enjoyed it!
I miss teaching and love sharing all the sewing knowledge I have gained throughout the years!
Unfortunately, only one person showed up, but we had a good time! And all the chocolate cake was for us. 🤭
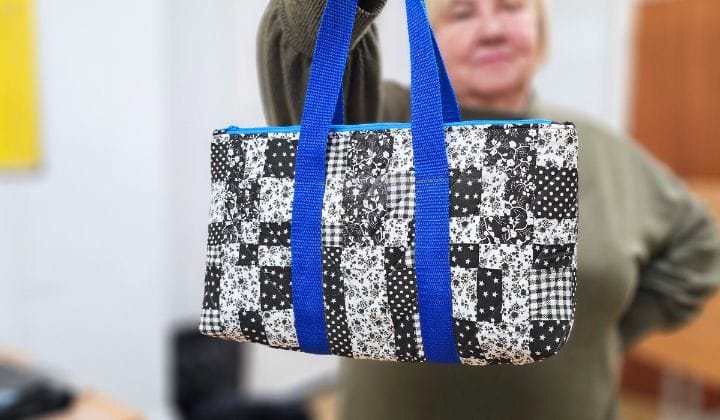
Mrs. J chose to do her quilted panel in different monochrome prints with a contrast zipper and handles in blue!

😎Confidence Corner:
As long as you keep going, you'll keep getting better. And as you get better, you gain more confidence. That alone is success. - Tamara Taylor
Growth isn't always measured by massive leaps; sometimes, it’s the steady, small steps that lead to the most significant changes.
In both sewing and life, determination plays a huge role in developing skills and deepening our confidence.
When we choose to keep moving forward, even when it’s difficult or uncomfortable, we develop resilience and a growing belief in our own capabilities.
Every lesson learned, every bit of effort invested, every moment we refuse to give up is a building block for confidence.
Success isn’t only about reaching a destination; it’s about embracing each step along the way and finding joy in the journey.
So, let’s keep going, even when the path isn’t clear. Each small step forward is a victory in itself, and that commitment to growth is, truly, its own success.
🧵Today's Sewing Tip:
Making a Patch Pocket
I made a patch pocket for my latest bag design and I am going to share with you how I made it.
This is not the only way to make and sew a patch pocket on, but I feel it is less fiddly to do it this way than the other most commonly used method, which is to fold the fabric under, press those edges into place and then sew it onto your project.
Step 1
Cut out 2 pieces of fabric in your preferred shape (eg. Rectangle, square, heart, circle,...). I cut out rectangles for my project.

Step 2
Place the fabric pieces with right sides facing each other, and pin around the edges or in the centre to hold them in place.
Since you’ll need to turn it right side out, leave an opening along one side or the bottom.
To avoid forgetting the opening, mark it clearly on the fabric so you’ll see it when you reach those points while sewing.

Step 3
Sew all the way around, and backstitch a few times at both marked points to secure the stitches.
This will prevent the stitches from coming undone when you turn the pocket right side out.

Step 4
Trim all four corners of the fabric, being careful not to cut into the stitching. Since I used a ¼ inch seam allowance, I didn’t find it necessary to trim the seam down further.

Step 5
Turn the pocket right side out by gently pushing the fabric through the opening you left. Carefully push out each corner to make them sharp, being careful not to pierce the fabric. Then, press the pocket flat with an iron.

Step 6
Position the pocket on your project wherever you’d like it to be. To help align it, I drew a line parallel to the top edge of my fabric lining and centered the pocket along that line.
Ensure that the unstitched opening is either at the sides or at the bottom of the pocket.

Step 7
Stitch around the edge of your pocket with an ⅛ inch seam allowance, making sure to sew over the opening you used to turn the pocket right-side out. Leave the top edge unstitched so the pocket remains open for use.
If your pocket is a bit long, you can add an extra line of stitching down the middle to divide it into two separate sections.
⭐My Favourite Things This Week:
- Finished writing the PDF instructions for my, no name yet, quilted bag pattern.
- Making small progress on my socks.
- Started making a Fleur dress for me in a fabric that has been in my stash far too long!
- My Quilted Bag pop-up workshop.
🗓️Upcoming Plans
- Finish up the Bi-Colour Snuggle Sweater from Anxious Girl Knits.
- Knit my socks a little more.
- Finish my Fleur dress.
- Do some work on my next bag design.
- Make some gifts for friends and family.
🎉Upcoming Events
23rd of November 2024 - Sew&Bond - Sewing Social Event - in Gatley Hill House, South Manchester, 11:45h - 17:15h
Email bianca@beesilva.co.uk and quote reference: SEWBOND011
For more information: https://www.beesilva.co.uk/sewbond011/
14th of December 2024 - Sew&Bond - Sewing Social Event - in Gatley Hill House, South Manchester, 11:45h - 17:15h
Email bianca@beesilva.co.uk and quote reference: SEWBOND012
For more information: https://www.beesilva.co.uk/sewbond012/
2025 Dates!
18th of January 2025 - Sew&Bond - Sewing Social Event
23rd of February 2025 - Sew&Bond - Sewing Social Event
22nd of March 2025 - Sew&Bond - Sewing Social Event
26th of April 2025 - Sew&Bond - Sewing Social Event
Question of the Week:
What workshops would you like me to run?
Sign in below to leave your comment. 🤗
Thank you so much for reading it! And if you enjoyed it, please tell a friend about it to allow me to reach more people. 🥰
Bye for now,
B! xx


Member discussion