New Quilted Bag!

Hello!👋
Hope you have been keeping well!
Has it gone cold all of a sudden or what? 🥶
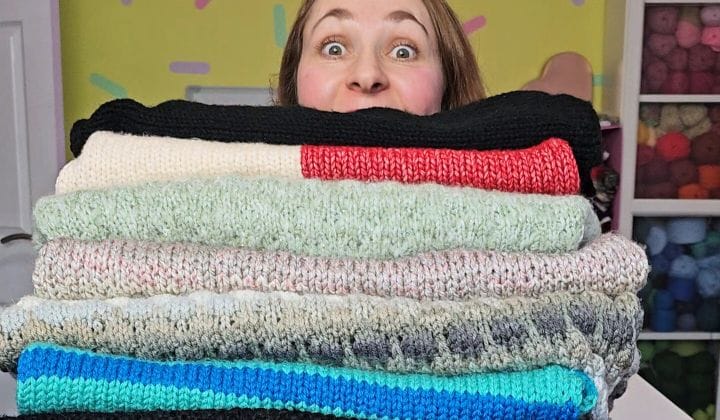
The air is freezing and the chunky knits are out!
It’s just a shame the sleeves on them don’t fit into my jackets.
I have been thinking of making a poncho style jacket since last year but actually haven’t gotten around to doing it. The sleeves on these jackets are quite large, or wide, and my chunky knits will definitely fit inside.
To be honest, I haven’t actually searched yet for a pattern I would like to make.
The next outerwear item on my list is a calf length waistcoat/gilet in a waterproof leopard print fabric I already have! 😍
So this will most probably happen before a poncho.
And I have had not only the fabric since last winter for it, but the pattern too.
I would like to show you what the fabric looks like, but it is currently packed away in the loft, so I will show you once I get it down.
The pattern I have is one from Grasser, the number 635.

The only thing I am dreading, once again, is the instructions!
This is a pattern from the same company that I was making my partner's jacket with. I bought both of the patterns at the same time!
The line drawing look a lot easier to make than my partner’s, so let’s see how it goes when I get to it.
What I have been working on this week is the pattern test for The Petite Dressmaker, the Fairwyn dress.
I love making dresses with big sleeves and gathers and this is one of them! Although I haven’t started on the sleeves yet.

I decided to use the otter fabric and when I was cutting out all the pattern pieces earlier during the week, I cut the bodice pieces wrong. 🤦🏼♀️
I cut out 2 full lining bodices(front and back) instead of one main and one lining. The outer main has gathering on the bodice and the lining has darts, so I couldn’t get away with it and definitely had to cut out a new main bodice.
Luckily, I had enough of the otter fabric to recut this part, not sure what I would have done otherwise.
I did a couple of adjustments to the bodice which I don’t normally do to my patterns, but this has made all the difference!
I made a small bust adjustment and lowered a dart at the neckline and I am very excited to try on the finished piece! 🤩

I have also made a little progress on the zippered pouch I have been designing.

The hardware I ordered to finish off the bag is not working out like I envisioned in my head, so it has delayed my process a little until I decide what design feature I want to go ahead with.

This picture is the third version I have tried to secure the zipper down, and I have unpicked this maybe 4 or 5 times now as I have not been happy with the stitching.
Yes, I am using black thread and that just highlights how squiggly the stitches are, but I want it to be easy for you to sew too. So I need to find another method or a different manner to hold the zipper down.
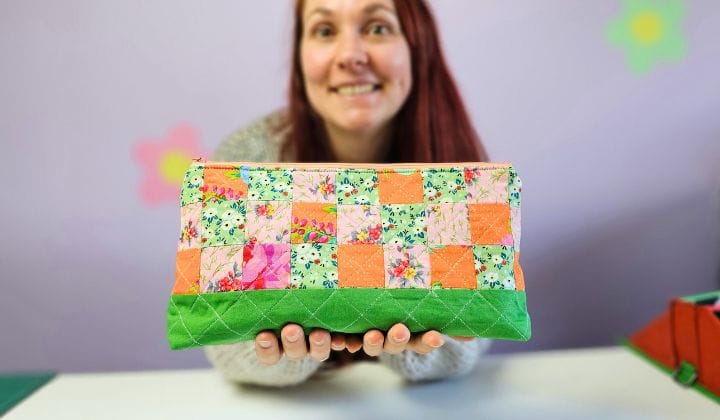
On the other hand, the quilt squares bag I was making to use as a sample for my upcoming workshop is now finished! 😀


I love the colour combination and I have a couple of family members who have claimed it. 😂
I was writing up the instructions for this as well to release as a PDF pattern, but I got distracted along the way, and ended up forgetting to take pictures of the steps.
To top it off, I made a second sample this week of the bag and I never took any photos for the instructions again! 🤦🏼♀️


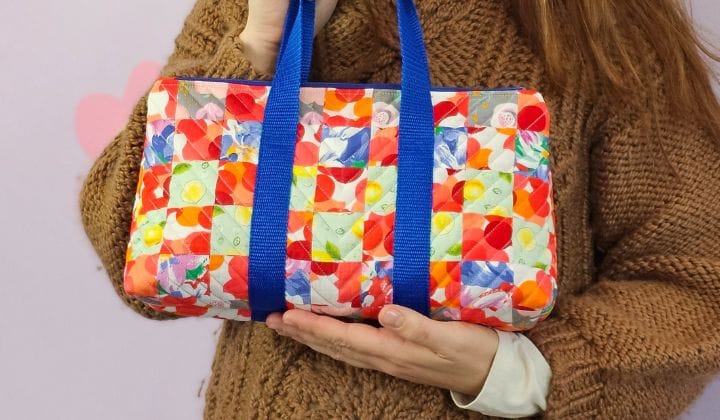
I made this one out of some of my fabric scraps and some of the vinyl I got last week from the market.
I love the look of the quilted vinyl, but I am going to use foam next time instead of batting to give it more of a poufy or fluffy look.

I won’t be using the vinyl necessarily for this same pattern again, but will definitely use it for something sometime soon! 😀
This means I still have to make another sample of this bag to take photos and review the written instructions to turn it into a PDF pattern for you.
I hope to get a start on it this week!
Progress has been slow this week on the Bi - Colour Snuggle Sweater by Anxious Girl Knits.

I have started sleeve number 2 in the Limestone colour and I am really enjoying working with the Pebble Haze Aran yarn! 😍
Sorry if I sound like a broken record with this yarn, but I really do love the feel of it in my hands!

As I mentioned to you before, I wanted the sleeves to be smaller so that they could fit into my jackets and I also wanted to reduce the wideness of them.
So I have been doing my own thing on them. It seems to have worked out well for the first sleeve, so I am going to repeat it for the second sleeve.

I have made it ¾ length, increased to form a balloon shape at the cuff and then reduced it into a ribbing.
I have not yet cast off the first sleeve because I want to see if I like how both of the sleeves look when finished and then decide from there.
On a side note, I have worn my pistachio glitter Jasmine Sweater twice this week and have felt fantastic in it! 🤩

I also need to start planning what my next knitting project should be because the current one is just about finished. Just another week or 2 to go.
I still have the socks in my mind and I would like to make another Evie cardigan from Knit Stitch Repeat in a size up from the last one I made.

At the time of writing this, the pattern is yet to be released but I would like to make another version and I am not yet sure which colours I want to use for it.
I made a couple of scrappy vests a while back and, as much as I like to see others wearing scrap yarn knitwear, I have realised I don’t often reach for mine.

So I know that I need to use the same colour threads throughout, or plan them out in block colours like my blue sweater.

Lastly, I have some, not very good, news about my cutting table. 🥺
I had noticed a few weeks ago that the middle had started to dip.
The weight of the fabric plus me working on the table most days, must have been a bit too much for the setup I had.
Luckily, our friend was able to come by yesterday (Saturday) to help resolve the problem!

We added some small pieces of MDF board to offer more support for the wheels and we added another set of wheels in the middle.
For now, it looks like it will handle itself pretty well, but let’s see what happens with time. 🤷🏼♀️
😎Confidence Corner:
If you aren't going all the way, why go at all? - Joe Namath
This quote refers to the power of commitment and the importance of giving our best effort in everything we pursue.
It reminds us that if we are going to start something, we should put our all into it as half-hearted attempts usually don’t lead to great results.
Whether in sports, work, sewing, knitting or designing, why start it if you aren’t willing to put in the time and effort it needs. Even though it can be tough, to be successful, you need to show up, put in the work and push through all the challenges.
True fulfilment will come from not only completing the task at hand, but knowing that you gave it your all, learned from the process and created something from your dedication and skill.
So, if you’re going to start something, whether it's starting a new sport or a simple sewing project, aim to see it through with your full energy and focus. The journey will be more rewarding, and the outcome will likely exceed your expectations.
🧵Today's Sewing Tip:
Sticking Together a PDF Pattern
A lot of the sewing patterns available out there today come in a PDF format allowing you to print them at home at your convenience. And depending on the pattern, you may have 2 pages to print or 50!

Sticking the A4 pages together is a simple process, but one that requires a little patience to make sure that everything lines up correctly.
The materials you will need for this are:
- Printed PDF pattern pages
- Scissors
- Cellotape or glue stick ( my preference is cellotape)
- A large flat surface
- Ruler can be helpful for accuracy
Printing the pattern:
The pattern instructions will normally tell you at what scale to print the patterns, and this tends to be at “Actual size” or 100% scale. The printout will also normally come with a test square to measure if it has printed at the correct size. The squares tend to be 1 or 2 inches in size.

I have also come across a pattern that had a 6 inch line to measure.
Trim the Pages:
Most PDF patterns come with borders or margins. Use scissors to trim off the edges of the pages (usually one or two sides) so the pattern lines up properly when assembling.


Organise the Pages:
Lay out all the pages in numerical order according to the pattern's layout diagram (usually provided in the instructions). It's like putting together a puzzle.
Align the Pages:
Match up the lines, notches, and pattern pieces on adjoining pages. There will often be markings like triangles, letters, or symbols that guide you on where to stick the pages together.

Once the edges are trimmed and the pages are aligned, use clear tape or a glue stick to stick the pages together.
I like to use some sort of weight to hold down the pages while I stick them together to avoid them shifting during the process.


Cut Out the Pattern Pieces:
After the entire pattern is taped together, you can either cut out the individual pattern pieces as indicated, or, what I normally do is, trace the pattern pieces I need and keep the original in one piece.
This is generally for those patterns that are garments and not accessories.
Like this, if I want to sew for someone else or my weight fluctuates over time, I don’t need to reprint and stick all those pages together again.
To make life easier for you:
- Try working on a large surface to make it easier to spread out the pages.
- Double check you are assembling the correct view or size and cutting out the correct lines for your project.
Making sure you stick the pattern together well will make your sewing process much
⭐My Favourite Things This Week:
- Working on 2 bag/pouch designs.
- Wearing my Jasmine Sweater.
- Working on a new dress - pattern test.
- Making progress on the Bi-Colour Snuggle Sweater in the Pebble Haze Aran yarn.
- Fixing my cutting table.
🗓️Upcoming Plans
- Keep knitting the Bi-Colour Snuggle Sweater from Anxious Girl Knits.
- Make another quilted sample bag to write up the instructions.
- Continue making the Fairwyn pattern test from The Petite Dressmaker.
- My partner’s jacket - we have finally decided on a new pattern, but I am not so sure this will be going ahead anymore. 😑
🎉Upcoming Events
26th of October 2024 - Sew&Bond - Sewing Social Event - in Gatley Hill House, South Manchester, 10:15h - 15:45h
Email bianca@beesilva.co.uk and quote reference: SEWBOND010
For more information: https://www.beesilva.co.uk/sewbond010/
Workshop - MAKE A QUILTED BAG with a ZIPPER AND POCKETS
Location - Gatley Hill House, South Manchester.
Date - 3rd of November 2024, 10:45h - 16:15h.
Price - 49.90£.
For more information: https://www.beesilva.co.uk/make-a-quilted-bag-with-a-zipper-and-pockets/
Email bianca@beesilva.co.uk and quote reference: QUILTED
23rd of November 2024 - Sew&Bond - Sewing Social Event - in Gatley Hill House, South Manchester, 11:45h - 17:15h
Email bianca@beesilva.co.uk and quote reference: SEWBOND011
For more information: https://www.beesilva.co.uk/sewbond011/
14th of December 2024 - Sew&Bond - Sewing Social Event - in Gatley Hill House, South Manchester, 11:45h - 17:15h
Email bianca@beesilva.co.uk and quote reference: SEWBOND012
For more information: https://www.beesilva.co.uk/sewbond012/
Question of the Week:
Have you ever done quilting before?
Sign in below to leave your comment. 🤗
Thank you so much for reading it! And if you enjoyed it, please tell a friend about it to allow me to reach more people. 🥰
Bye for now,
B! xx


Member discussion