It’s Too Big!
Bianca SilvaWith June fast approaching, the #sewbloodpressure25 sewing challenge is back!

For the third year running, I am hosting a sewing challenge on Instagram.
I started this challenge in 2023 because my dad passed away suddenly at the beginning of that year.
We later found out that the main cause of his passing was due to him having hypertension that had gone untreated.
He was a couple of weeks away from a GP appointment and he never made it.
The aim of this challenge is to raise awareness to the fact that high blood pressure is dangerous if left alone.
Know your numbers and don’t leave for tomorrow what you can do today.
Stop putting things off, whatever it is.
Tomorrow is not guaranteed.
You can participate in this challenge from anywhere in the world, all you need to do is:
Sew a garment you have been putting off for a while. A while could be a weeks, months or even years, and I know we all have long sewing to-do lists! 🤭
Donate £2 or more which is optional this year. I don’t want a donation to be a barrier in you being able to participate in this challenge.
Share your completed garment anytime in June and use #sewbloodpressure25 when posting it on Instagram.
If you want to share work in progress photos/videos, please use #sewbloodpressure25wip
Follow and tag me, @beesilva.creates, in your posts so I can see and share your work with others.

I really hope you can all find the time to participate in this challenge.
I am doing it for you, not only so you can get your blood pressure checked, but also to tick some things off your to-do list. 💪
-
I finished the Sarah Skirt by NH Patterns! Let me tell you all about it.
It's too big! 😑

My waist measurement (29.5’) was in between sizes but it was leaning more towards the larger size, size 12.
The finished measurement for a size 12 is 31 inches and for a size 10, is 29 inches.
For this reason, I decided to go with a size 12 to be on the safe side.
In my mind, the extra space was to be able to tuck a shirt or jumper inside, but it’s too big.

I really need to sort it out.
Unpicking the invisible zipper from the waistband is not a task that is appealing to me now though.
My other thought is to unpick the waistband on the opposite side seam to be able to open it.
Try on the skirt inside out, stick a few pins where I want my new seam to be and sew right down the side.
This will make the waistband appear that its initial pieces were cut in 2 and not on the fold.
The only issue doing it this way, is that the front seams on the panel will be off centre.
That being said, the print is so busy I don’t think you will be able to tell anyway.
I definitely want to make this skirt again and when I do, I will shave ¼ inch off each panel that joins at the side seams to make it even.
It has been a really nice easy sew with a beautiful result, just unfortunate it came out big.
This pattern is a pay-what-you-can on the NH Patterns website along with many of their other patterns, so definitely give this one a try if you are looking to make some skirts.
-
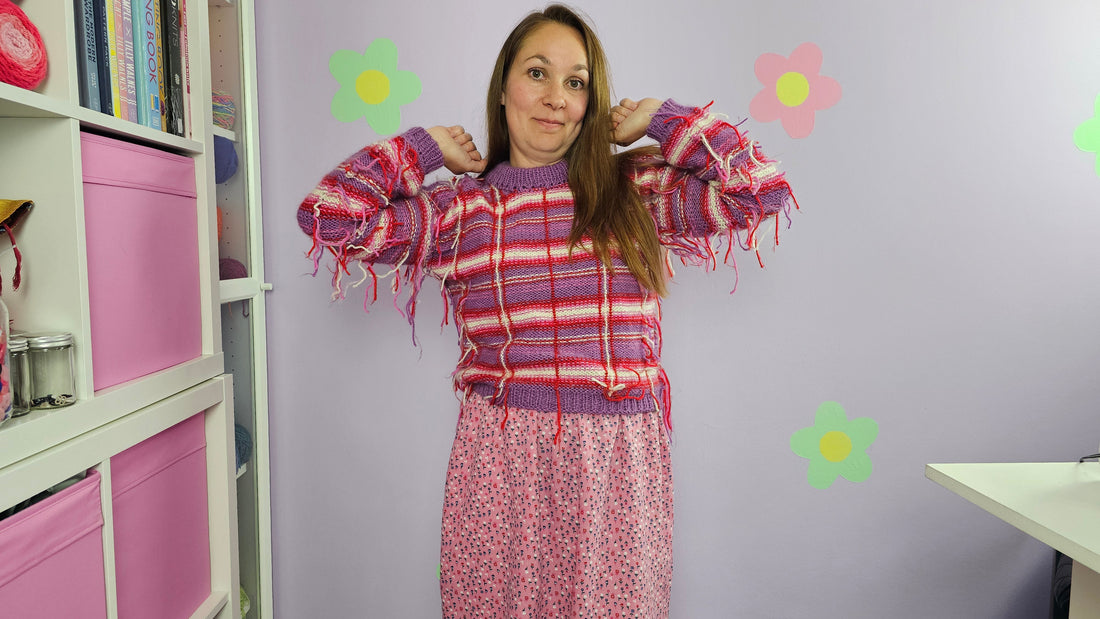
I finally managed to finish my purple sweater!

Well, apart from crocheting the vertical contrast rows on the sleeves and blocking it.
I love it! ❤️
It has truly been a labour of love.
All the colour changes and crochet details, which was something new I learnt, has made this project a long one.
For you to get a better understanding, I started this sweater on the 21st of February! 😲
And it is still going to take me some more time to finish because I changed colours so many times, I have a million and one ends to weave in. ☠️

I somewhat enjoy this task, but only for a handful of ends…not thousands.
Anyway, I can now reveal the little secret project I was working on in collaboration with Wool Warehouse.
They sent me a few skeins of their new yarn ahead of release day to experiment with.
I had never worked with 100% cotton yarn before, but I quite liked the feel of the yarn as I was knitting it.
To be in time for their release day, I felt like I needed to make something to show off the yarn, so I decided to make a quick project, a scrunchie.

I use scrunchies often and thought making one out of yarn would be a nice addition to my hair accessory stash.

I picked 5 colours, Petal Pink, Pale Lilac, Powder Blue, Mojito Green and Peach, with the intention of making a scrunchie in each colour.
But I don’t think that is going to happen anymore. 😬
I crocheted the cast on and cast off edges as suggested by the pattern I was following, but it wasn’t as easy as I thought it would be.
It took me about 1.5 hours to crochet, instead of 10 minutes!
I couldn’t get the hook through the stitches on one of the edges making life so difficult. 😩
I am not sure what I will be doing with the rest of the yarn, maybe a summer top, not sure.
If you are interested in checking these out, head over to the Wool Warehouse website and search for Yarnsmiths Cotton DK. They come in 120 shades!
This Week's Tip:
Adjustable Straps for Tops, Dresses or Lingerie
In the last private lesson I was teaching, we made some adjustable straps for a summer top that is still in the works and I will share with you how we did it.

We started by creating the straps using the same fabric as the top by folding it and pressing it in place like you would to create bias binding.
Once the strap was stitched down the double folded edge, we moved on to adding the hardware to it.
There are 2 pieces that are needed to make a strap adjustable, a ring and a slider.

One end of a strap is threaded up through one side of the slider, over the middle bar, and down the other side.

The end of the strap is then folded on itself by about 1 inch and stitched in place. If the raw edge isn’t finished and may fray, you can turn it under to catch in the stitch line.
I like to stitch back and forth 2 to 3 times to strengthen the area.

Thread a smaller strap through the ring, join the raw edges and stitch ¼ inch from the raw edge.

For this step, I like to lay my pieces in front of me to make sure I get it right.
The side with the slider should have the part of the strap that was folded under facing up.
To keep everything looking neat, I like to make sure my topstitching is all on the same side.

Take the free end of the long strap and thread it through the ring.

This part can be a little fiddly. Take the raw edge of the long strap and thread it through the first opening of the slider, over the centre bar(now covered with fabric) and back down the other side again.

Pull on the loose end so the strap lays flat with the against the other side of the strap and that’s it!
Adjust the strap to what suits you.

News Corner:
Calling all Sewing Bee fans: Applications are now open for series 12
If you love the Great British Sewing Bee as much as us, then you'll be pleased to hear that it's just been announced that applications are now open for series 12.”
Read the full article here:
https://www.prima.co.uk/leisure/tv-and-film/a64572632/sewing-bee-applications-open-series-12/
Videos I posted this week:
Ruffle Tote Bag, Sarah Skirt, Sewing Challenge | WEEKLYBEE EP12
How to Sew a Straight Line Perfectly | Sewing Explained
Upcoming Events:
Sew&Bond - Sewing Social Event - 24th of May 2025
📅 Date: 24th of May 2025
⌚ Time: 11.45h - 17.15h (5.30h)
📍 Location: Manchester, Cheadle, SK8 4EY
Thank you so much reading! And if you enjoy reading, please tell a friend and leave a comment!
Until next week, happy creating!😘
Bye for now,
B! xx