
A Full Weekend!
Bianca SilvaHello, hello!
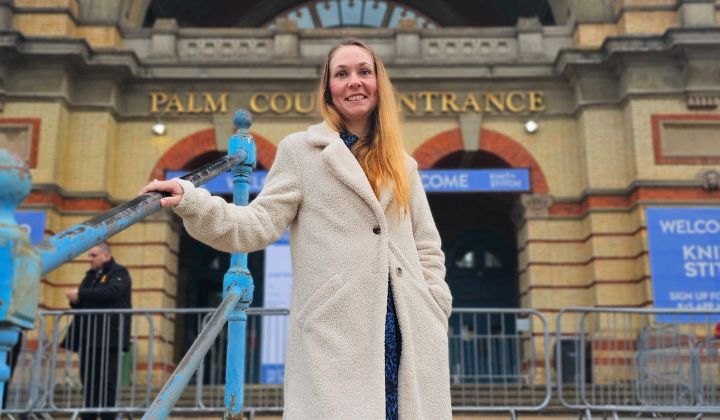
This weekend we went on a little road trip down south to visit the Knit&Stitch Show!
I enjoyed it a lot more than the first time I went to the one in Harrogate a few years ago.
There was more space to walk around and the ceilings were high making the space feel breathable and not cramped.
We spent the whole morning walking around looking at all the stalls and artwork around the venue, there some really amazing pieces of work!
I bumped into some of the contestants from the Sewing Bee, Lauren, Matthew, Stewart, Caz, and I had a brief chat with them. I also went by the Tilly and the Buttons stand to say thank you to Tilly for sponsoring our upcoming event at Janome in November.
One stall my kids got hooked on as soon as we walked in was the FAD DAB DO. They really enjoyed using the stencils to dab paint onto a t-shirt, and I thought we would never leave. 😂
We must have spent about 20 minutes there. I definitely know what I can get them for Christmas now!

Stitches of the Week
BeeSilva - Advent Calendar
I’ve nearly finished both advent calendars for my daughters!😎
For one of them, I need to sew all the wooden numbers on. But for the other, I used some of the time spent in the car to sew all the numbers on, I just need to push the dowels through the channels!🥳
The dowels I have are a little thinner than what I was expecting, so for the top of the calendars, I pushed 3 through the channel. For the bottom channel, I just used one to keep it all straight.
My sister wants one for her son too, but after seeing in real life how large I made them, she wants something a little smaller.😂
I still don’t know where my two are going to hang.
If I choose the fireplace, I need to make a couple of holes for screws, but the downside is, we won’t be able to actually see the fireplace.
I think the next best place would be to hang them on a door, because they are literally the width of our doors!😂
When the time comes we will figure it out.
Fabric: Calico for the backing, polycottons for the pockets.
The Adventure: one of the calendars went on a road trip to the south of England to keep me entertained in the car.

Two O Nine Fabric - Hanbok Vest (Sewing Therapy)
I am so excited by how it’s looking already!😍
Everything is quilted and cut out!
I drew a grainline on all the fabric and used a 45 degree angle to quilt all the diamond shapes.
This drawn grainline on the fabric was so helpful to match up the grainline on the paper pattern piece. Now my diamonds on all the panels are in the same direction.
I’ve started making my own bias binding now out of black cotton poplin, it’s all cut, I just need to press the edges in.
As I write this, I’ve just remembered I haven’t cut the waist ties. Anyway, I’ll probably do that tomorrow sometime.

Take It or Leaf It Sweater - Karas Knit Eng
I finally picked this up again!💪
I took advantage of the fact that I was going to spend some time in the car travelling, so this one came with too.
I frogged the whole cable section on the side I made the mistakes and used a short cable needle to re-knit it all.
The stitches don’t look as pretty as the first time round, especially because the tension changed but I’m hoping when I block it, it spreads out the stitches better.
I can’t believe how long I left it for, and all it took was about an hour, maybe an hour and a half, to do.
Well, part of me not picking it up was trying to find the time to film the process so you could see how I did it. But I ended up not documenting the process.
On the other hand, this means I can start on the sleeves next week, because I’ve also seamed the back and front shoulders together already.😃
Yarn: Yarnsmiths Create Super Chunky gifted by Wool Warehouse paired with Drops silver thread.
Size: XS
Needle Size: I am using a size 6mm for the ribbing and an 8mm needle for the body. The yarn suggests a 10mm for reference.
The Win: A roadtrip later, we are back on track to continue with the sweater!😃

Skill Builder of the Week
Cutting Striped Fabric
A couple of weeks ago, I made a yellow ribbed jersey dress and I want to share a little tip I’ve picked up along the way when cutting a print like this out and your pattern piece needs cutting on the fold.
These are the steps I take:
- I don’t cut the fabric on the fold because it can be more time consuming to try and get the lines straight on the layer of fabric that is underneath.
- I lay the fabric out single layered.
- I normally pick the bottom of the armscye and match that point with a stripe while also making sure I match both the grainlines of the pattern piece and fabric.
- I cut around the whole pattern piece except where it’s meant to be cut on the fold.
- I mark where the fold is - normally just at the top and bottom points and not the whole way down.
- This makes it easier to match the pattern piece back once I flip it over to cut the other half of the pattern.
- I make sure the bottom point of the armscye matches the same stripe from the other side, match the grainlines again and then cut out the rest of the dress.
This helps to make sure the stripes go horizontally across and are not angling down more on one side than the other.
Maker Spotlight
This week’s spotlight goes to @made_by_madeleine.claire!

Madeleine made this beautiful regency dress for the Jane Austen Festival in Bath.
It was her first time making a historical costume, and she didn’t make one, she made two! One each for her and her mum.❤️
I really like this style of dress and would like to make myself one too sometime in the future.🤭
The dress pattern is from Kitty J Berry.
Want to be featured in my newsletter? Just reply with a pic of your make. I’d love to see what you’ve made!😍
Events:
Sew&Bond™ - 31st of January 2026 (4 Spots Left!)
Sew&Bond™ - 28th of February 2026 (6 Spots Left!)
Sew&Bond™ - 28th of March 2026 (5 Spots Left!)
Sew&Bond™ - 25th of April 2026 (7 Spots Left!)
Workshops:
Build Your Confidence in Sewing Workshop
From Fabric to Finished Tote Bag Workshop
Sewing Patterns:
Thanks for reading and happy sewing!
Bye for now, B! xx